Shopify Setup
After creating zones, regions, and rates in Smart Shipping, you need to enable them in your Shopify admin for customers to see them at checkout.Step-by-Step Setup Process
Step 1: Access Shipping Settings
- Go to your Shopify admin dashboard
- Navigate to Settings → Shipping and delivery
- You’ll see your current shipping setup
Step 2: Create Matching Shipping Zones
For each zone you created in Smart Shipping, you need to create a corresponding zone in Shopify:- Click Create shipping zone
- Enter the same zone name you used in Smart Shipping
- Add the same countries/regions you configured in Smart Shipping
- Click Done to save the zone
Zone Matching is CriticalYour Shopify zones must exactly match your Smart Shipping zones (same name and countries) for rates to work properly.
Step 3: Add Rates to Your Shipping Zone
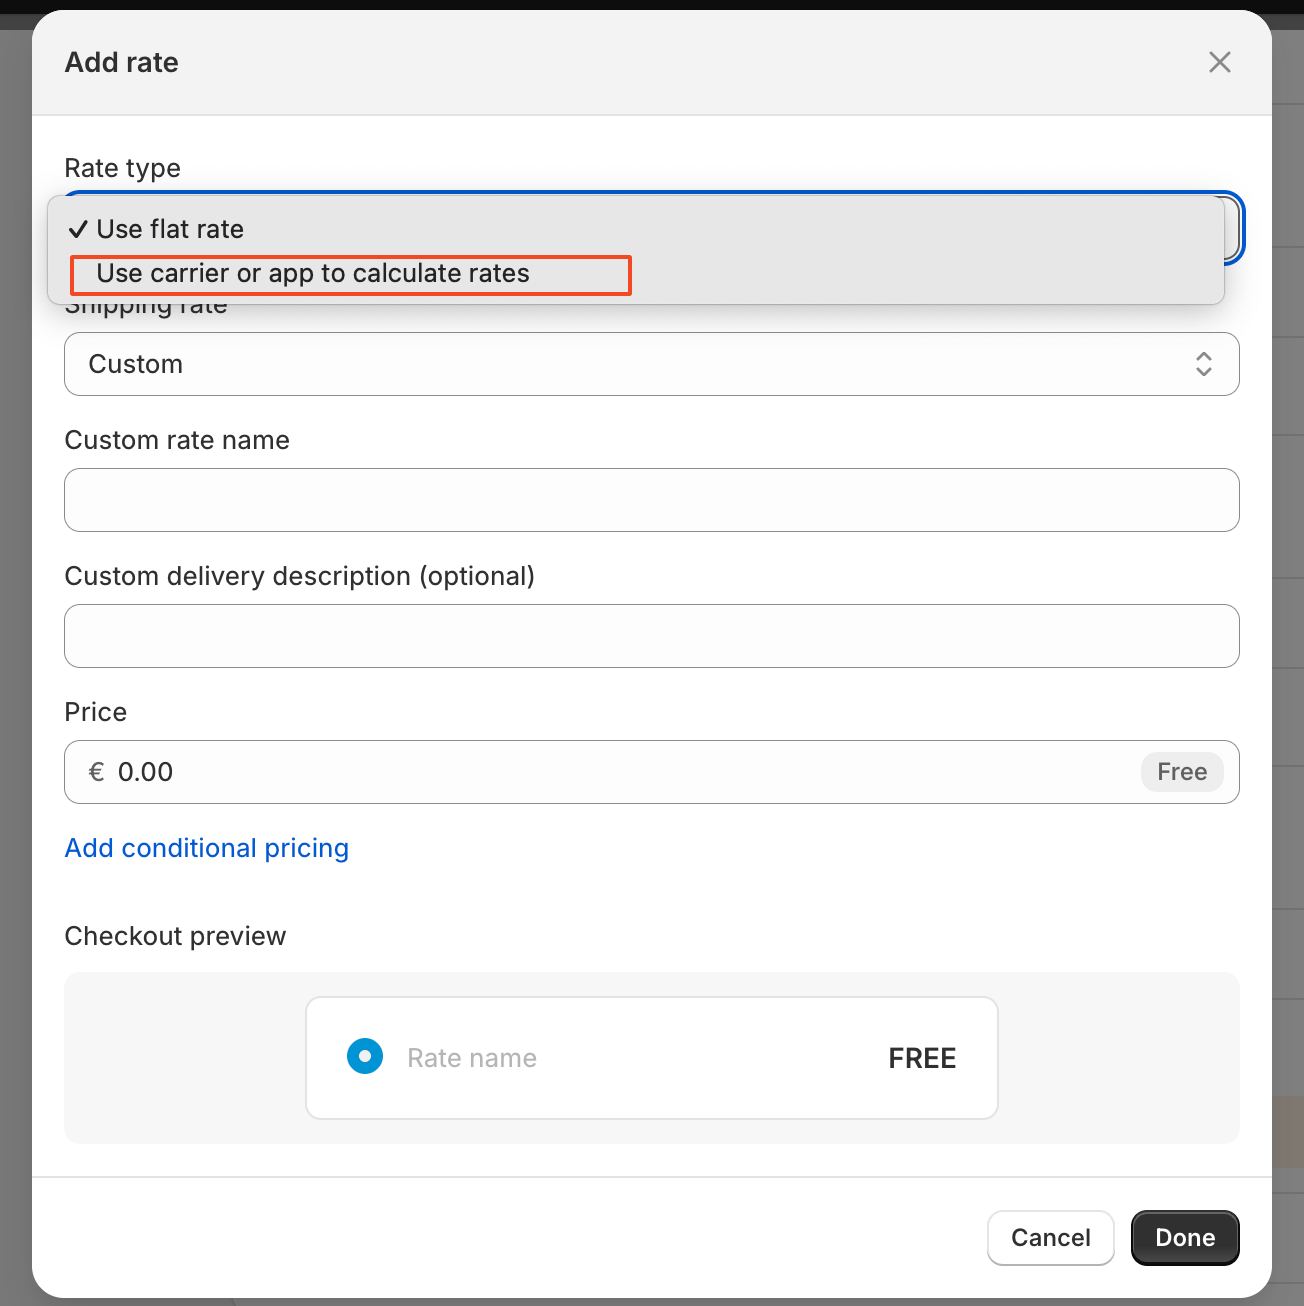
For each shipping zone you just created, you need to add Smart Shipping as the rate provider:- Click Add rate in the shipping zone
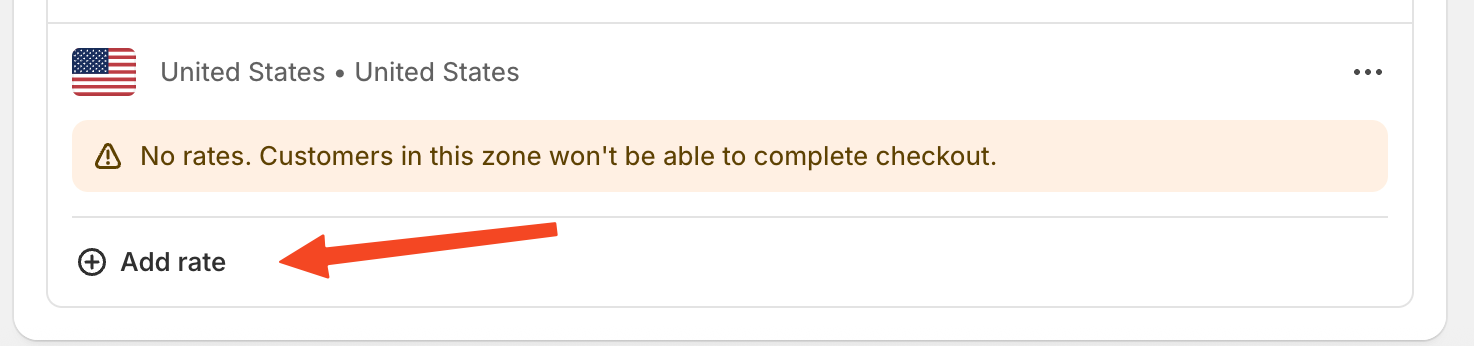
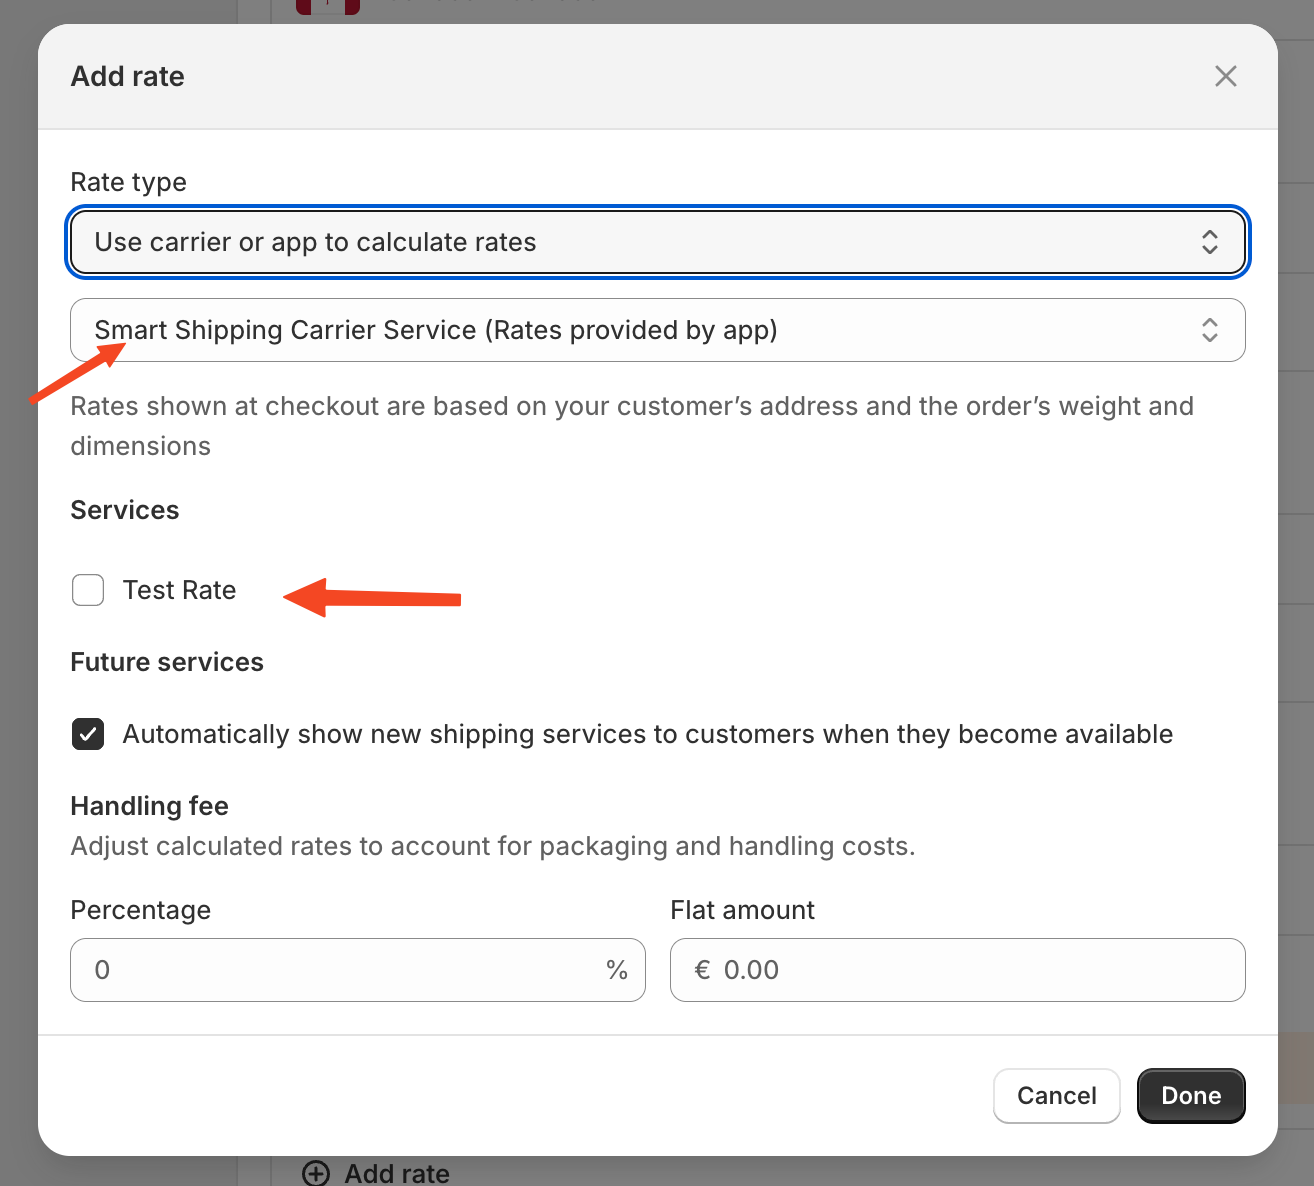
- Select Use carrier or app to calculate rates
- Choose Smart Shipping from the available apps list and click Done
Complete Setup Summary
- Access your Shopify shipping settings
- Create shipping zones that match your Smart Shipping configuration
- Add Smart Shipping as the rate provider for each zone
- Test your setup at checkout
Common Setup Scenarios
Single Zone Setup (e.g., US only)
- Create one Shopify zone called “United States”
- Add United States as the country
- Enable Smart Shipping for this zone
Multi-Zone Setup (e.g., Domestic + International)
- Create “Domestic” zone → Add your home country → Enable Smart Shipping
- Create “International” zone → Add other countries → Enable Smart Shipping
Regional Setup (e.g., North America, Europe, Rest of World)
- Create each regional zone with appropriate countries
- Enable Smart Shipping for each zone separately
Verification Steps
After completing the setup:- Test at checkout: Add items to cart and go to checkout
- Enter different addresses: Test addresses from different zones
- Verify rate names: Ensure your Smart Shipping rate names appear
- Check calculations: Confirm prices match your Smart Shipping configuration
Troubleshooting
Rates Not Showing
- ✅ Verify your Shopify plan supports Carrier Calculated Shipping
- ✅ Check that zone names and countries match exactly
- ✅ Ensure Smart Shipping is selected as rate provider
- ✅ Test in Rate Sandbox first
Wrong Rates Appearing
- ✅ Disable other shipping apps or manual rates
- ✅ Check for overlapping zones
- ✅ Verify rate rules and conditions
Need Help?
- Shopify Plan Issues: Contact Shopify Support to enable Carrier Calculated Shipping
- Smart Shipping Setup: Use our Rate Sandbox to test your configuration
- General Support: Contact us through the Smart Shipping app
What’s Next?
Once your zones are enabled in Shopify:- Your rates are live and customers will see them at checkout
- Monitor your shipping performance in Smart Shipping analytics
- Adjust rates as needed based on customer feedback